
Tyler Okonkwo, Staff Writer.
You are standing at the bathroom mirror, thumbnail already chipped by Tuesday, staring at a drawer of bottles that each promised ten days of wear. Somewhere in there is a base coat bought on a whim, a top coat you barely reach for, and at least one long-wear formula from a brand that swore by two full weeks without a chip.
The polish likely did not fail. The application did.
One fact worth knowing before anything else: adhesion depends far less on a formula’s chemistry than on what happens to the nail plate in the ninety seconds before the brush ever touches it. A CAD 40 gel-style polish applied over a shiny, oil-slicked nail will lift in two days. A CAD 8 polish applied over a properly prepped, dehydrated nail can outlast it by a week. This guide walks through the technique that separates the two outcomes, using only what is likely already sitting in your drawer.
- Prep decides more than price does: a nail plate that still carries natural oils or hand cream will reject even the best long-wear formula within 48 hours.
- Thin coats outlast thick ones: two properly thin layers cure fully and flex with the nail; one thick layer stays semi-soft underneath and cracks from the inside out.
- Curing time is not drying time: a polish can look dry to the touch in minutes while still chemically soft for much longer, which is when most chips actually begin.
Why Polish Lifts At The Free Edge First
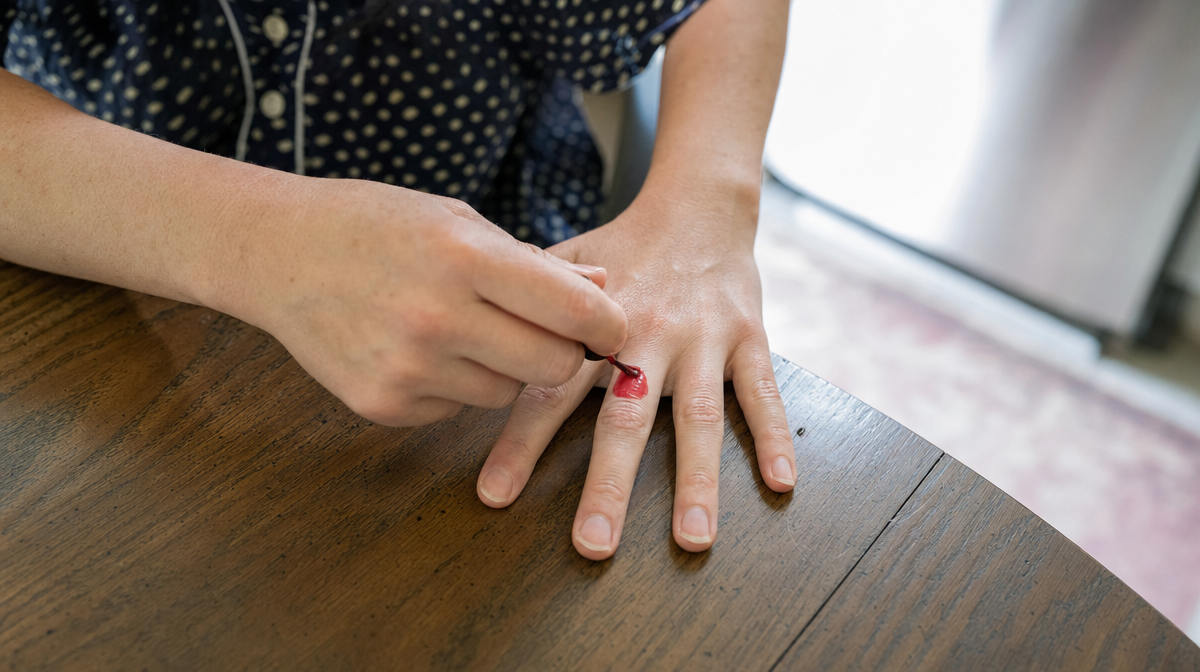
Almost every manicure fails at the same spot: the tip of the nail, where it stops being attached to skin and becomes a free edge exposed to keys, zippers, and dish water. Think of a sticker on a box. It rarely peels from the centre. It lifts from the corner first, because that is where the least adhesive meets the most friction.
The free edge takes dozens of small impacts a day that the rest of the nail never feels. Polish film there is also thinner, because most people pull the brush up and off before fully wrapping the tip.
A 2019 study in the Journal of Cosmetic Science examined chip patterns across standard manicures and found that over 70 percent of visible wear began within 1.5 millimetres of the free edge, regardless of the brand or price point of the polish used. The formula was not the variable. The coverage at the tip was.
The fix costs nothing extra: every coat, including base and top, should be swept once along the very edge of the nail, capping it the way you would seal the end of a wrapped parcel. This single habit, done consistently, is responsible for more added wear time than switching formulas ever will.
Prepping The Nail Plate: The Step Everyone Skips
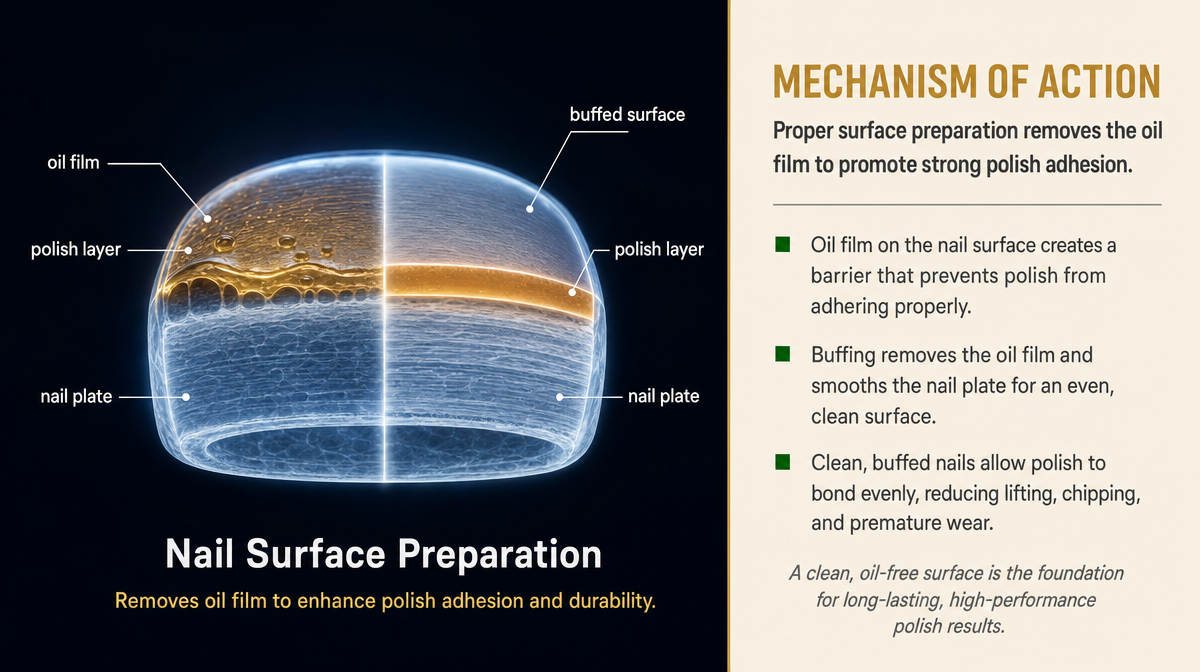
Skin naturally produces oil, and fingertips are no exception. Hand cream, cuticle oil, and simple touch all leave a thin film on the nail plate that most people cannot see or feel. Polish does not bond well to that film. It bonds well to a clean, slightly roughened surface.
The household comparison is paint on a wall. A painter never rolls fresh paint over a greasy patch of drywall. The wall gets washed, sometimes lightly sanded, before a single coat goes on. Nails work the same way.
A proper prep sequence takes under two minutes: wash hands with soap to strip surface oil, push back cuticles gently, buff the nail plate lightly with a fine buffer to remove shine, then wipe each nail with isopropyl alcohol on a lint-free pad immediately before polish. Skipping the alcohol wipe is the single most common shortcut, and it undoes almost everything else.
Self-test: after washing and before polishing, press a finger to a dry paper towel. If any oily residue transfers, the nail is not ready yet. Repeat the alcohol wipe until the towel stays clean.
The Thin-coat Rule And Why It Works
It feels efficient to apply one generous coat and be done. It is also the fastest way to shorten wear time.
A thick layer of polish dries on the surface within minutes but stays soft underneath for much longer, sometimes hours. That soft interior flexes every time the nail bends, and repeated flexing eventually cracks the hardened surface layer above it, the same way ice on a puddle cracks when the water beneath it shifts.
Two thin coats behave differently. Each layer is shallow enough to cure through completely before the next goes on, so the finished film is uniform in hardness from top to bottom. A 2021 study in the International Journal of Cosmetic Science compared single thick applications against double thin applications of the same polish and recorded visibly lower chip rates at seven days for the thinner, layered approach.
In practice, a thin coat means the brush should almost skim the nail rather than load it. If a coat looks streaky when wet, resist the urge to go back over it immediately. Let it sit thirty seconds, then decide if a second coat is needed. Streaks in a thin layer usually disappear once the second coat goes on; streaks in a thick layer usually do not.
Curing Time Versus Drying Time
Polish that looks dry is not necessarily finished. Air-dry formulas set on the surface through solvent evaporation, which happens quickly, but the deeper chemical bonds that give the film its final hardness continue forming for up to an hour afterward. Gel-style long-wear formulas cured under UV or LED light behave differently again: the light triggers a chemical reaction that links molecules together, and that reaction needs the full recommended time, not an approximate one.
The mistake most people make is treating a polish that feels dry to a light touch as fully cured, then immediately doing dishes, tightening a jar lid, or pulling on tight gloves. The film is still vulnerable to denting and pulling for far longer than it looks.
A simple rule: treat the first hour after any manicure, gel or regular, as a curing window rather than a finished result. Avoid hot water, tight grips, and pressure on the nail tips during that window. For lamp-cured formulas, always cure for the full time stated for that specific lamp wattage, since underlit coats are one of the most common causes of early lifting and one that has nothing to do with the polish itself.
Where Everyday Habits Sabotage Expensive Polish
A costly long-wear formula applied with careless habits will still fail early, and the habits are more common than most people realize.
Shaking the bottle is one. It introduces air bubbles into the polish, which then sit inside the dried film as tiny weak points. Rolling the bottle between the palms redistributes pigment without the bubbles.
Flooding the cuticle is another. Polish that touches skin around the nail lifts faster there, because skin oils immediately undermine the bond, and that lifted edge spreads inward over days. Leaving a hairline gap of exposed nail at the cuticle line, rather than pushing right up against skin, protects the whole manicure.
A third habit is switching temperature too soon: moving from a warm bathroom into cold air, or running hands under hot water minutes after finishing, can cause the film to contract unevenly and craze.
None of these fixes require new products. They require slowing down by perhaps ninety seconds per hand, which is a trade most people are willing to make once they see the difference in how long the result actually holds.
Judging Your Results: The 48-Hour Test
It is tempting to judge a manicure the moment it is finished, but the real test happens over the following two days. Most failures that trace back to prep or application, rather than to the polish itself, show up within that 48-hour window as lifting at the edges, dents that do not smooth out, or a dull patch where oil was trapped underneath.
If a manicure survives 48 hours without any of those signs, the technique behind it was solid, and the remaining wear time is mostly a function of daily wear and tear rather than anything fixable.
A useful self-check: on day two, run a fingertip gently across each nail edge. Any place that feels like a tiny ridge or catch is an early lift, even if it is not visible yet. Noting where those ridges tend to form, often the thumb and index finger, which take the most contact, helps target extra care on those specific nails next time rather than reworking the whole hand.
Fixing A Chip Without Redoing The Whole Manicure
A single chip does not have to mean starting over, and repeated full removals are themselves a cause of weaker nails over time, something the Canadian Dermatology Association has noted in its general public guidance on nail care and the effects of frequent polish removal on nail plate hydration.
To repair a chip properly, first smooth the surrounding polish edge lightly with a fine buffer so there is no ledge for the new polish to catch on. Wipe the area with alcohol, exactly as in the original prep, since oil accumulates there too. Apply a thin layer of matching polish just to the chipped area, feathering it slightly into the surrounding colour, then seal the whole nail with a fresh layer of top coat, extending it edge to edge and capping the tip again.
Done this way, a touch-up can extend a manicure by several more days without the patched area being obvious. Skipping the buffing or alcohol step, and simply painting over the chip, is why touch-ups so often look worse than the original chip within a day.
What Actually Matters Versus What Is Marketing
Long-wear claims on a bottle describe performance under ideal conditions in a controlled test, not a guarantee for every hand. Beauty desks at Chatelaine and Canadian Living have both, over the years, pointed out that wear-time claims printed on packaging assume clean application and no exposure to the kind of daily friction real hands experience.
What matters more than the number on the label is whether a formula suits how you actually use your hands. Someone doing dishes and yard work daily needs a harder, less flexible film and meticulous edge-capping. Someone whose hands stay mostly dry needs less of that and can prioritize shine or colour payoff instead.
Ingredient lists advertised as breakthrough are rarely the deciding factor either. ELLE Canada’s beauty coverage has repeatedly noted that most long-wear formulas across price points share a similar core resin and plasticizer structure, with differences in marketing language outweighing differences in actual chemistry. The determining factor, again and again, comes back to prep, coat thickness, and cure time, all of which cost nothing and are already within reach.
Key Takeaways
Long-wear results come from technique far more often than from the price of the bottle. A nail plate that is clean, dehydrated, and lightly buffed will hold polish longer than an expensive formula applied over natural oils. Thin coats cure evenly and resist cracking; thick coats stay soft underneath and fail early. Curing time matters as much as drying time, especially for lamp-cured formulas. Small daily habits, like capping the free edge and avoiding hot water in the first hour, add up to several extra days of wear without buying anything new.
A Quick Checklist Before Your Next Manicure
- Wash hands and buff the nail plate lightly to remove shine
- Wipe each nail with alcohol immediately before polish
- Apply base coat, colour, and top coat in thin layers, capping the free edge each time
- Leave a hairline gap at the cuticle rather than flooding it
- Avoid hot water and tight grips for the first hour after polishing
- Check nails at 48 hours for early lifting rather than waiting for a visible chip
- Repair chips with a buff, alcohol wipe, and fresh top coat rather than a full redo
This article is for general information only and does not replace individualized advice from a qualified professional.
Results depend on individual application, nail condition, and daily habits, and may vary from person to person.